From personalised cards to beautiful artworks, there are endless applications for brush lettering. Most artists who practice brush lettering use brush pens, otherwise known as brush markers.
Brush pens have a flexible nib, allowing you to vary the thickness of the lines produced. By applying different amounts of pressure, you can create a clean dynamic look which looks great on any form of artwork.
However, it can often be hard knowing where to start with brush lettering, so we’ve put together a handy beginners guide to this wonderful technique. With our top tips, you’re just a short moment away from creating your very first brush lettering masterpiece.
What you’ll need
To get started with brush lettering, it is essential that you have the right tools to begin with. Here are some of the things that you’ll need:
Brush pen – There are a wide variety of brush pens that are suitable for lettering. Tombow have a nice selection of colours to choose from as part of their ABT range, with each pen featuring a long flexible tip to create beautiful calligraphic lines. The ProMarker range from Winsor & Newton also offers a wide range of twin-tipped pens, with hundreds of colours to choose from.
Paper – When you practice brush lettering it is important to choose a smooth paper to begin with. We recommend the Daler-Rowney Calligraphy Pad, which is ideal for calligraphy, pen & ink work and certificate writing. This pad also offers 3 different shades of white, buff and stone.
How to begin
- Start by holding your brush pen with a firm grip, similar to how you would with a regular pen. Note that holding the pen closer to the tip will give you more control. As a ‘neutral’ position, start by holding the pen at a 45° angle.
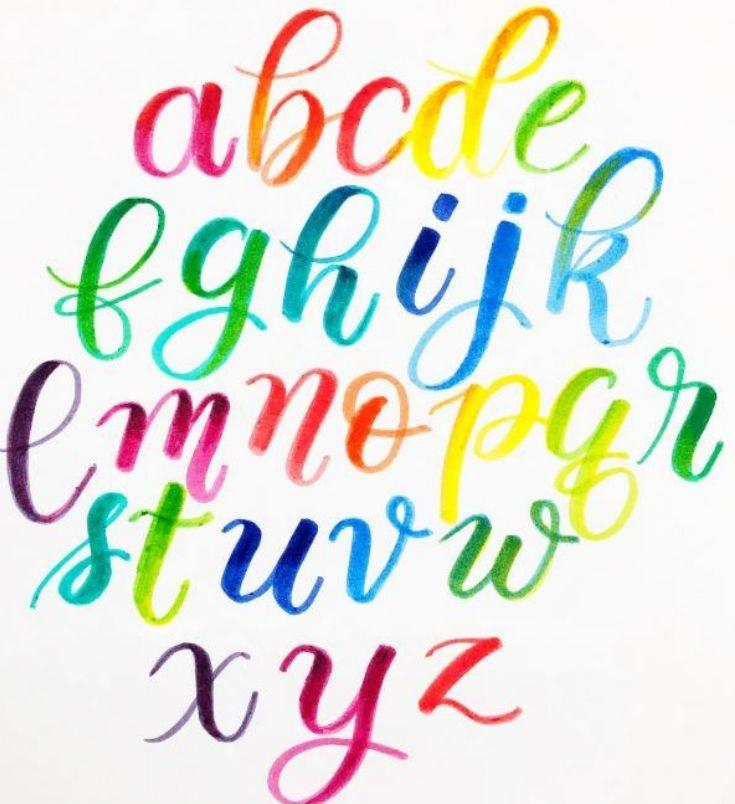
- There’s only one technique behind brush lettering, and it’s all about the pressure you apply. Your upstrokes will produce much thinner lines, whereas downwards strokes will be a lot thicker. Start by practicing on some spare paper, with up and down movements to become familiar with the pen. Here is a useful template to practice the alphabet on.
- Once you’ve had some practice, it’s time to discover your own style to create your own font. We suggest browsing Pinterest or Instagram for some inspiration. It’s important to practice both lowercase and uppercase, to get the hang of the style and gain consistency.
Our top tips
Now that you’ve got the hang of the basics, there are a few tips that you should be aware of to become more advanced:
- Take your time. Don’t try to rush your brush lettering, as it is a skill that takes time to master. Calligraphy is an art form, and as such requires time and care.
- Experiment with a selection of materials. Try using different types of paper and different styles of pen to see which suits your style best. You may find that a wider pen may be best for you, for example.
- Try rainbow lettering. Popular on social media, rainbow lettering is great for taking your art to the next level. Simply change your pen colour for each letter, creating a beautiful rainbow of vibrant shades.
Why not put your creative skills to the test and experiment with bullet journaling? Read our blogs for some inspiration.
Bullet Journaling with Moleskine
Make sure to browse our full range of brush markers and other markers to get started on your next creative project.
< Back to blog


